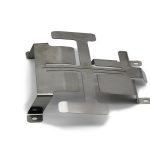
Sheet Metal Fabrication is just a series of processes such as bending, riveting, and welding of metal materials. Below are 71 Terms You Must Know About Sheet Metal Fabrication:
- 1. Cutting material: refers to the process of obtaining a rectangular workpiece through a shearing machine. The company uses CNC shearing machine for net size fabrication and blanking. This is the fabrication of workpieces with low requirements. The process engineer should use this process for production, and the fabrication cost is low.
- 2. Digital punching: refers to the punching operation with a CNC punching machine. Normally, programming is required. Normally, the surface of the digital punching diagram should be processed as the direction of the front of the part production. , the quantity will be processed enough at one time.
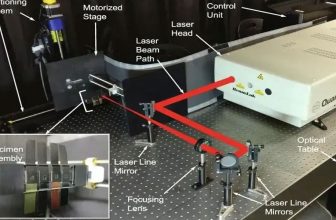
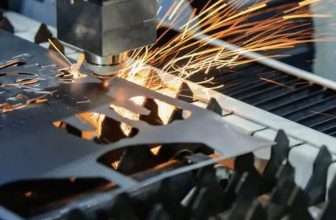
- 3. Laser cutting: refers to the process in which the workpiece is cut by laser cutting. The fabrication cost is high, and the process engineer should use this process less.
- 4. Cutting machine cutting: refers to a process of cutting materials with an electric grinding wheel cutting machine. This is not very demanding, and most of them are cutting materials. This process has certain fabrication safety risks, and process engineers should use it sparingly. this process.
- 5. Saw material: refers to a process of cutting material with a sawing machine. This is not demanding, and it is mostly cutting material for profiles.
- 6. Blanking: refers to the process of obtaining the shape of the product by using a mold on an ordinary punch or other equipment.
- 7. Punching: refers to the process in which the workpiece is machined by ordinary punching machines and molds.
- 8. Bending: refers to the process in which the workpiece is formed by the bending machine. Our company refers to the use of CNC bending machines and corresponding bending dies, and the first test machine, machine adjustment, and first inspection can be produced before production.
- 9. Punching and folding: It refers to the use of ordinary punching machines to install special molds for the bending of small and simple workpieces.
- 10. Forming: refers to the process of deforming the workpiece by using a mold on an ordinary punch or other equipment.
- 11. Hole drawing: also known as “flanging”, which refers to the process of using a die to form a round hole on the workpiece on an ordinary punch or other equipment. Our company refers to a drawing process that uses ordinary punching machines and special molds to increase the thickness of the tapping. The process engineer must explain the hole diameter and quantity in detail.
- 12. Drilling: refers to the drilling operation with a drilling machine. When several punching and general punching are inconvenient for fabrication, a small amount of manual fabrication is performed. Normally, the method of scribing is used to add punching points to locate drilling. The process engineer should Use this technique sparingly.
- 13. Die plate drilling: refers to first fabrication a template with a number of punches, and then using the positioning method to perform batch drilling.
- 14. Tapping: refers to the process of machining internal threads on the workpiece.
- 15. Hole reaming: refers to the process of fabrication small holes on the workpiece into large holes with drills or milling cutters.
- 16. Countersunk hole: refers to the process of machining a taper hole on the workpiece in order to match the connector like a countersunk head screw. The company refers to using a drilling machine, using suitable drill bits (90 degrees, 120 degrees), and using countersunk head screws for on-site interviews. Normally, the plane of the countersunk head screws should be flush with the countersunk hole surface of the workpiece. must use the real method.
- 17. Pressure riveting: refers to the process of firmly crimping fasteners such as pressure riveting nuts, pressure riveting screws or pressure riveting nut columns on the workpiece by using a punch or hydraulic press. Normally, the direction of loading the pressure riveting parts is the burr direction, so that the pressure riveting parts can be loaded smoothly. If not, the manufacturer should report it in time.
- 18. Riveting: refers to the process of first countersinking the workpiece, and then using a punch or hydraulic press to firmly crimp the rivet nut on the workpiece.
- 19. Pull mother: refers to a process similar to riveting. The process of firmly connecting connectors such as rivet nuts (POP) to the workpiece with a pull mother gun.
- 20. Pull riveting: refers to the process of tightly connecting two or more workpieces with pull rivets using pull rivet guns as tools.
- 21. Riveting: The process of connecting two or more workpieces face-to-face with rivets. For countersunk riveting, the workpieces need to be countersunk first.
- 22. Punching and convex hull: refers to the process of forming a convex shape on the workpiece with a die on a punch or hydraulic press.
- 23. Punching and tearing: also known as “punch bridge”, which refers to the process of forming a workpiece into a bridge-like shape with a die on a punch or hydraulic press.
- 24. Imprinting: refers to the process of using a mold to punch out characters, symbols or other imprints on the workpiece.
- 25. Corner cutting: refers to the process of cutting off the corner of the workpiece using a die on a punch or hydraulic press.
- 26. Punching mesh holes: refers to punching out mesh holes on the workpiece with a die on an ordinary punch or a CNC punch.
- 27. Flattening: refers to the process of transitioning a workpiece with a certain shape to a flat.
- 28. Drilling: refers to the process of using a drill to drill a hole on a drilling machine or milling machine.
- 29. Chamfering: refers to the process of fabrication the sharp corners of the workpiece using molds, files, grinders, etc. 30. Leveling: refers to the process that the workpiece is uneven before and after fabrication, and other equipment is used to level the workpiece.
- 31. Back teeth: refers to the process of repairing the second screw teeth on the pre-tapped workpiece.
- 32. Protective film: refers to the process of using a film that can protect the surface of the workpiece to protect the surface of the workpiece.
- 33. Tear off the protective film: refers to the cleaning process of the protective film on the surface of the workpiece.
- 34. Shape correction: refers to the process of adjusting the workpiece that has been processed and formed.
- 35. Heat shrinkage: refers to the process of using heating equipment (heat gun, oven) to shrink the plastic covering the workpiece.
- 36. Labeling: refers to the process of sticking the label to the designated position of the workpiece.
- 37. Wire drawing: refers to the process of using a wire drawing machine and abrasive belt to process the surface of the workpiece.
- 38. Polishing: refers to the process of using polishing equipment to brighten the surface of the workpiece.
- 39. Heat treatment: refers to the process of special treatment to improve the hardness of the workpiece.
- 40. Deburring: refers to the process of removing the burrs of the workpiece with tools such as grinders and files during the sheet metal fabrication of the workpiece, so as to make the workpiece fabrication place smooth and flat.
- 41. Argon welding spot welding: It refers to the spot welding operation with argon welding machine, which refers to the process applied when the welding quality requirements are high. When the process engineer is making the process requirements, the joint seam needs to be welded for several years. It is normal. The spot welding spacing is between 30-50MM.
- 42. Full welding with argon welding: It refers to the full welding operation with argon welding machine, which refers to the process applied when the welding and grinding quality requirements are high. Note that there should be no deformation after full welding.
- 43. Butt welding: Also known as “spot welding”, it refers to the process of welding and connecting workpieces face to face by a butt welding machine. Our company refers to using a butt welding machine for spot welding, which is a resistance butt welding machine, and the process engineer should give priority to this process when doing the process.
- 44. Second-protection welding spot welding: refers to the spot welding operation with carbon dioxide gas shielded welding machine, which refers to the process applied when the welding quality is generally required. When the process engineer makes the process requirements, the welding point needs to be made for several years. , The normal spot welding spacing is between 30-50MM.
- 45. Second-protection welding spot welding: refers to the use of carbon dioxide gas shielded welding machines to perform full welding operations, and refers to the process applied when the welding quality requirements are ordinary. The process engineer explains the full welding requirements for seams when making process requirements. There should be no deformation after full welding.
- 46. Planting welding: also known as seed welding, refers to the process of firmly welding the planting welding screw on the workpiece with a planting welding gun.
- 47. Welding and grinding: mainly refers to the process of using grinding machines, files and other tools to make the welding scar on the workpiece smooth and flat. Our company refers to the grinding operation of welding workpieces by hand-held electric moving grinding. For workpieces with high requirements for electroplating and spraying, special grinding wheels (sandpaper sheets) / 120 should be designated.
- 48. Pretreatment: After the sheet metal fabrication of the workpiece is completed, before painting or powder spraying, the workpiece is degreasing and degreasing with an electrolytic solution.
- The process of rusting and increasing the surface coating (such as phosphating film) of the workpiece and cleaning.
- 49. Ash scraping: refers to the process of using atomic ash to make up for defects on the surface of the workpiece, such as welding gaps or pits.
- 50. Scraping and polishing: mainly refers to the process of using a flat grinder or emery cloth to polish the surface of the workpiece after scraping. Our company refers to a repairing process that uses a pneumatic flat grinder to fill the workpiece with ash. Normally, only in the repairing process, there is a grinding and ash-filling process, which is corresponding.
- 51. Spray paint: refers to the process of using a special spray gun to spray paint evenly on the surface of the workpiece.
- 52. Spraying: Because the company is an automatic assembly line, temporarily only the spraying color number is specified in the process. One workpiece needs two color numbers must be specified, and the coating performance should be explained (outdoor, indoor, large/small orange pattern, thick /Medium/fine sand grain, flat light, photometric number).
- 53. Spray thread protection: It refers to a kind of rubber sleeve that protects the threads of nuts, screws and nut columns with special purpose. It can also be masking tape, high temperature tape, or protective sleeve. This protection is taken care of by the pipeline.
- 54. Spraying conductive protection: It refers to the protection of specific areas with high-temperature adhesive tape. If this is required, the process engineer must make special instructions for the process. This protection is taken care of by the pipeline.
- 55. Silk screen printing: refers to the process of using special ink to penetrate a special grid to form text or patterns on the surface of the workpiece. A series of inspections such as adhesion, organic solvent resistance, color difference, and fonts are required to be free of defects.
- 56. Electro-galvanizing: refers to the process of plating a layer of metal on the surface of the workpiece for protection or aesthetics. Our company refers to a kind of outsourcing production carried out by the planning department after the factory has qualified the iron workpieces that need to be electro-galvanized. The company normally requires blue and white zinc plating, the film thickness requires 8UM, and the neutral salt spray test is more than 48 hours. bad.
- 57. Nickel electroplating: refers to the process of plating a layer of metal on the surface of the workpiece for protection or aesthetics. Our company refers to a kind of outsourcing production carried out by the planning department after the factory has qualified the copper bar workpieces that need to be electroplated with nickel. The company normally requires bright nickel plating and copper accelerated salt spray test for more than 8 hours without defect.
- 58. Oxidation: refers to the process of forming an oxide film on the surface of the workpiece in order to protect or beautify the workpiece.
- 59. Sandblasting: refers to the process of fabrication the surface of the workpiece by sandblasting with a sandblasting machine.
- 60. Assembly: refers to the process of assembling two or more workpieces together. The assembly of sheet metal structural parts, in principle, the large parts sprayed and the tapping of the cabinet are responsible for the assembly.
- 61. Packaging: refers to the process of protecting the workpiece and facilitating transportation.
- 62. The surface of the digital punching diagram is the front side: in the future, it is required to use the diagram side as the front side for the process drawing. Because the symmetrical parts need to unify the burr direction, do not directly use the diagram side as the reverse side. The follow-up process engineer must improve , production found similar problems should be reported in a timely manner.
- 63. Burr up, burr down: In the future, the amount of drawings required for the process must be technically explained in the technical requirements. If the production is found, it must be reported in a timely manner for improvement.
- 64. Press riveting down, press riveting up: In the future, the amount of drawings required for the process must be technically explained in the technical requirements. If production is found, it should be reported in a timely manner for improvement.
- 65. Counterbore up, counterbore down: In the future, the amount of drawings required for the process must be technically explained in the technical requirements. If the production is found, it should be reported in a timely manner for improvement.
- 66. Programming: It refers to the fabrication program of the sequence of punching and die fabrication using the programming software of the equipment manufacturer and the CAD drawing file of the technology department on the special computer. Normally, the least punching times are used, and the trimming is normal. When ensuring the normal operation of the machine tool, it is necessary to share the edges.
- 67. Drilling tooling: It refers to a mold plate that needs to be positioned for artificial drilling, which should be taken into account by the process engineer when making the product process.
- 68. Welding tooling: refers to the technical requirements such as welding size, angle, position, space size, etc., which must be taken into account by the process engineer when making the product process.
- 69. Spraying conductive protection tooling: It means that the spraying protection area is large, and it can be sprayed with iron plates and fixed installation methods. It can only be applied when a large number of workpieces are moved.
- 70. Assembly tooling/checking tool: When assembling, in order to ensure that the customer’s application size does not appear to be poorly installed when the customer should respond, we must conduct a full inspection of the customer’s size and screws during assembly, such as 19 inches. mounting hole spacing. It should be taken into account by the process engineer when making the product process.
- 71. Bending inspection tool: It refers to the batch and complex workpieces, which should be taken into account by the process engineer when making the product process.


